Register your Business
1- Click on Register Button on main web page.
2- Fill-up the regestration page accurate as per your company scope of work and submit.

3- Check you email and confirm your login into the our online Look POS application.
4. Contact below mentioned our certified CSR before or after your account registeration.
Name : Umar Sharif
Contact : +92-300-5800-905
What's App : +92-300-5800-905
Email : sm@lookpos.com
For Example: "abc.company@gmail.com | Module: RESTURANT or Package: Business Gold"
Send this Text or you can send an audio message on whatsapp to make easy joining for you.
Our CSR is responsible to clarify your each querry and he will contact you back with an audio/text message as successfully authorized you complete module/package service freely for days.
6- Our CSR will support you to get the setting as you require and will advise to buy suitable package.
7- Our IT expert will freely shift your old products details and balances Lists and more, so you may start continouing your business from next day.
You can also download template file Excel format for your Old Product, Suppliers, Customers Lists and Balances to be Shifted to Look POS Online Office once in the start.


Business Setup
To customise your business settings, open Look POS Online Application >> "SETTING" where you can change setting for each tab in details.

Click below for learning Setting Tabs in details.
Business Setting Main/Head Office
Open Look POS Online Application >> Setting >> Business has 16 Tabs for your business setting
Customise it as you require. How? detailed below:
Business Basic Details - Default Setting

⬤ Sign-in "Look POS Online Office" and click on "Setting" >> "Business Setting" >> "Business"
1. Business Name: Fillup your correct business name in this field as a main head office
2. Business Start Date : Fillup your business start date in this field.
3. Default Profit percentage(%) : Fillup your business default profit percentage in this field. Any product profit percentage can be increase/decrease at the time of selling.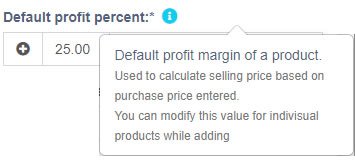
4. Currency & Symbol: Choose your business currency in which you are dealing, from the menu further the "Currency Symbol" will be placed with your each details.
5. Company LOGO : Upload your company logo.![]()
6. Time-Zone : Set your country time-zone in this field.
7. Financial Year Fist Month : Select financial year starting month in this field.
8. Stock Method : Select stock method name [FIFO/LIFO] in this field.
9. Stock Method : Select stock method name [FIFO/LIFO] in this field.![]()
Important! Please Do Not Forget to Save setting by pressing 
Tax Setting

⬤ Sign-in "Look POS Online Office" and click on "Setting" >> "Business Setting" >> "Tax"
1. Tax Name & Number: Fillup your Tax-1 & Tax-2 Name and number in the fields. So that will be the taxes you can autoapply or optional apply. 
2. Apply Tax Option: You can check the option "Enable in-line Tax in Purchase & Sale". So the above tax will auto applied on your purchase and sale.

Important! Please Do Not Forget to Save setting by pressing
Product Default Setting

⬤ Sign-in "Look POS Online Office" and click on "Setting" >> "Business Setting" >> "Products"
1. Product SKU Prefix: You can type Product SKU Prefix that would be further followed. 
2. Add Item Expiry : You can click on checkbox to enable add item expiry and select one options from below two.

You can select "Add Item Expiry" & "Add Manufacturing Date & Expiry Period" from the list.
3. Enable Product Brand: You can click on checkbox to enable product brand to be shown/filledup while adding it.
4. Enable Product Catagories & Sub-Catagories: You can click on checkboxes to enable Product Catagories/Subcatagories to be shown while adding it.
5. Item Default Unit & Enable Sub & Secondary Unit & Unit Screening : You can click on Dufault Unit Menu to select your chosen dafault unit to be displayed. You can also enable item's sub-unit & secondary unit to be displayed in field and recorded.
Further unit selection on Look POS screen option can be availed by enabling it.

6. Item Price & Tax Info: You can click to enable item price & tax info to be shown/filledup while adding it.
7. Item Position in warehouses & stores): You can enable item kept in Racks & Row and their position to record the item exists phisically at which location. So in your medical or other muliple location stores or warehouses, it is easy to find and shift your products on time.
Important! Please Do Not Forget to Save setting by pressing
Sales Default Setting

⬤Sign-in "Look POS Online Office" and click on "Setting" >> "Business Setting" >> "Sales"
1. Default Sales Discount Percentage: You can fill this field with a default sales discount figure (i.e 7.50) percentage. No need to type percentage symbol(%) only figure can be applied as percentage of discount.

2. Default Sales Tax Percentage: You can select default sales tax as added already in Tax Setting. if not added yet then this menu will not show any Tax list. To add sales tax in sales invocie you must make tax name & rate.

3. Sales Item Addition Method You can click on the menu and select sales item addition method as "Add Item in New Row" is normally usedfor no quantity issue a row will be made of sales item or you can select "Add Item Quantity if it Already Exists" which is purely make sales if quantity exists in store if not exists then a message on top right will be poped up  while clicking on item to be added during generating invoice/receipt/bill.

4. Amount Rounding Method You can click on the menu and select amount rounding options as "Round to Nearest Whole Numger" or "Round to Nearest Decimal(multiple of 0.05) or "Round to Nearest Decimal(multiple of 0.1)" or "Round to Nearest Decimal(multiple of 0.5)". See below the screen short.
5. Enable Sales Limitations and other Options :
a. You can enable "Sale Price is Minimum Sales Price", no sales man can sell item less than the selling price.

b .You can also enable "Allow OverSelling" while no quantity is available at the stores. Sometimes a trader have no stock but he wants to print invoices with a quantity will be taken in future. So he can allow Look POS to put the quantity as he desired for the item without available quantity at stores.

c. You can also enable sales order(SO) option by clicking checkbox. Some trader issue sales order for the customers.

d. To enable Payment Terms is always shown, click checkbox to allow showing it in sales.

6. Payment Link Generate : Enable payment link by clicking check box means generating link for the customer to pay through it. It must be connected with some payment platform.
For Example: RAZORPAY (Indian Payment Platform) is ready for generating payment link as below:

Important! Please Do Not Forget to Save setting by pressing
Sale Now POS Setting & Shortcut Keys

⬤ Sign-in "Look POS Online Office" and click on "Setting" >> "Business Setting" >> "Sale Now"
Whenever the User is going to make any sales on Look POS, below window opens for Quick Sales by clicking on "Sale Now" button on the top right of Dashboard.

Further it has shortcut keys, enable/disable featuresand Product Weighing Scale Barcode Scanning settings as below:
1. Enable/Disable Features in Look POS Sale Now Screen: Many features are built-in enabled in sale now Look POS Screen which can be disabled/enabled as below:
a. Multiple Pay Button
![]() is used while selling products to customer and he wants to pay in multiple ways. So the cashier can disable from the setting to limit the customer by paying through single pay not multiple ways.
is used while selling products to customer and he wants to pay in multiple ways. So the cashier can disable from the setting to limit the customer by paying through single pay not multiple ways. 
b. Draft Button ![]() is used if user/cashier doesn't want to make transaction but to save info as draft invoice. You can disable it by clicking on checkbox "disable Draft".
is used if user/cashier doesn't want to make transaction but to save info as draft invoice. You can disable it by clicking on checkbox "disable Draft".

c. Disable Credit Sale Button is built-in enabled, you can disable it to not to sell your products on credit by any staff.
d. Hold Sales Button
 is to hold the sales made by user for any reason and can be disabled by clicking "disable hold sale" checkbox
Further you can also allow the hold invoices/bill to be printed by clicking on "Print Invoice on Hold" 
e. Disable Discount & Order Tax:You will find these both can be seen in last of product list and its total  which can be disabled by clicking on
f. Subtotal Editable: While adding products into your sale now screen you will find subtotal in the end of each product row.

You can enable subtotal of each product by enabling from its setting

g. Enable Service Staff in Product Line: You can assign sales staff limited to sell different products, it can be enable from the settings as per below screen short.
further if you also want to keep a service staff required for your products may also be enabled from the option "is service staff required.![]()
h. Sell Now Screen - Invoice Related: You can enable within the sell now screen:
- Showing invoice scheme 
- Dropdown invoice layout 
- Print invoice on hold
- Showing price on product suggestion tooltips.
2. Product Weighing Scale Barcode Setting:Configure barcode as per your weighing scale.
a. Prefix: You can keep barcode prefix starting number here in this field.

b. Product SKU Length: Every product has a seperate SKU number, you can keep a length for your SKU number in the barcode partially(1-9) by selecting from this menu.

c. Quantity Part Length: You can increase/decrease quantity length(1-5) partially in your barcode.
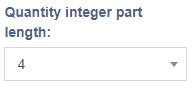
d. Quantity Fractional Part Length: You can increase/decrease by selecting quantity fractional part length(1-4) of number in this menu.

3. KeyBoard Shortcuts:
Shortcut should be the names of the keys separated by '+'(i.e ctrl+b).
Available key names are: shift, ctrl, alt, backspace, tab, enter, return, capslock, esc, escape, space, pageup, pagedown, end, home, left, up, right, down, ins, del, and plus.
You can keep your own keys to run fast your sales process by your cashier.

Important! Please Do Not Forget to Save setting by pressing
Purchase Default Setting

⬤ Sign-in "Look POS Online Office" and click on "Setting" >> "Business Setting" >> "Purchase"
Default Enable/Disable Features


Important! Please Do Not Forget to Save setting by pressing
Payment Denomination Default Setting

⬤ Sign-in "Look POS Online Office" and click on "Setting" >> "Business Setting" >> "Payment""
1- Default Cash Denomination: You can set default cash denomination by seperating them with a "," comma as described in screen short.

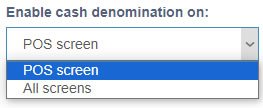
2- Enable Cash Denomination on Screen: You can select from manue for the cash denomination to be enabled on "POS Screen" only or "All Screens" by default.
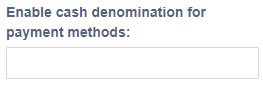
3- Enable Cash Denominations for Payment Method: You can set cash denominations for your payment method by default.
4- Stict Check: You can enable a strict check for the payment amount must be equal to sum of cash denomination.

Important! Please Do Not Forget to Save setting by pressing
Dashboard Stock Alert

⬤Sign-in "Look POS Online Office" and click on "Setting" >> "Business Setting" >> "Dashboard"
You can set default stock expiry alert (any)days for the products items in stock.

Important! Please Do Not Forget to Save setting by pressing
System | Theme | DataTable | Help Text

Sign-in "Look POS Online Office" and click on "Setting" >> "Business Setting" >> "System"
1. Theme Color:You can set default theme color for Look POS Online Office by selecting color from the menu.

2. Data-Table Pages Number of Enteries: You can select from the manue to set default number of enteries in datatables pages.

3. Enable Help Text: You must keep this option enable to follow the correct guid at any steps/inputs.

Important! Please Do Not Forget to Save setting by pressing
Default Prefixes Number Setting

⬤ Sign-in "Look POS Online Office" and click on "Setting" >> "Business Setting" >> "Prefixes"
Look POS provides you prefixes abbreviation heads code to be started as per your choice.
For example: You can set "PO" for Purchase Order, whenever you will create a new purchase order the numbgering will start from PO-00001.

Look POS have all the heads to have your inserted prefixes by default.

Important! Please Do Not Forget to Save setting by pressing
Company Email Default Setting

⬤ Sign-in "Look POS Online Office" and click on "Setting" >> "Business Setting" >> "Email Setting"
Todays the businesses need to update their customers and suppliers for ledgers, invoices, orders & payments through your company email, sms & supplier/customer Look POS online account.
For your company default email setup, kindly follow the below steps:
1. SMTP Hosting Server | Port: Your company email of any platform provides you SMTP Host & Port information to integrate your email address on other platforms. Please provide SMTP Host name, supose you have your company email at hotmail hosting server so you can type in "Host" field www.hotmail.com and then Port number "560".

2. User Name(Email) & Password: Further you will provide your email address in User Name field and your same password in Password field.

3. SSL/TLS Encription: There is SSL/TLS certification at your emailing platform which you provide here in this field to encript your emailing data.

4. From Name & Address: When you will send emails to your customers or suppliers it will be sent from your concerned department/employee name & email address, so you can type here email address in "Address" field and name of Department/Employee in "Name" field.
5. Send Test Email: You will find a button "Send Test Email" after filling the above form. You can press it to check a test email to your email hosting server.

Important! Please Do Not Forget to Save setting by pressing
Company SMS Default Setting

⬤ Sign-in "Look POS Online Office" and click on "Setting" >> "Business Setting" >> "SMS Settings"
SMS Nexmo | Twilio Built-in SMS Platform: If your company can access "Nexmo" or "Twilio" SMS services then you must select one of them. 
Set Nexmo Key:You can setup "Nexmo key"

Secret Code:You must provide "Secret Code" which is taken from the platform, in this field.

From Name: You can provide here a default name in this field.

Important! Please Do Not Forget to Save setting by pressing
Customer Reward Points Setting
a. Enable Reward Point: 
⬤ Sign-in "Look POS Online Office" and click on "Setting" >> "Business Setting" >> "Reward Point Settings"
If you have regular customers and you want to give them earning points which will be benifiting him to order more at your stores, then follow below steps:
1. Earning Points Setting:
b. Display Name: Please Type concerned name like i.e. "Earning Points"

c. Customer Spent Amount per Point: Please type a figure like "100" so whenever the customer bought $100 products they will earn 1 point.

d. Customer Minimum Spent Amount for Earning Point: Please type a minimum amount for customer to earn points. 
e. Customer Maximum Spent Amount for Earning Point: Please type a maximum amount for customer to spend and earn points to be redeemed further.

a. Redeem Amount Per Unit Point: You can type any amount i.e "100" or "1" in this field and this will be equal to 1 Point.
b. Minimum Customer Orders Amount to Redeem Points: You can type a minimum amount at which a customer orders reaches then he can redeem the earned points.
c. Minimum Points to be Redeemed: You can also restrict customer to redeem the point if it reaches the number you enter in this fild. For example "5" so the customer can redeem the points until earned 5 minimum points. If you keep this field blank then customer can redeem any points earned uptodate.

d. Maximum Points to be Redeemed: You can type maximum points numbers limit in this field for the customer can redeem at a time.

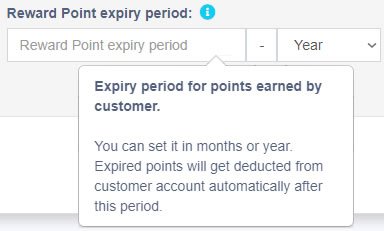
e. Points Expiry Date: You can type months or year for the points to be expired. After that customers points will be automatically deducted if not redeemed yet.
Important! Please Do Not Forget to Save setting by pressing
Modules Enable / Disable

⬤ Sign-in "Look POS Online Office" and click on "Setting" >> "Business Setting" >> "Modules"
We have all type of Look POS Online Office holders like Traders, Manufacturers, Wharehouses, Super Market, Medical Stores, Resturants, Airline Tickting etc.. They all have enabled modules as per their scope of works. They can enable and disable modules by their choices. If you disable any module then it will not be shown in your left main office manue.

Important! Please Do Not Forget to Save setting by pressing
Custom New Lables & Fields

⬤ Sign-in "Look POS Online Office" and click on "Setting" >> "Business Setting" >> "Custom Labels"
1. Create New Label & Field for Custom Payments: You can create upto 07 New Labels and their Fields for payments. When your customer usually make payments through these Banks or financial institutions.

2. Create New Label & Field for Contacts(Customer & Supplier): You can add a new custom field for any additional information may be taken while generating new contact(customers & suppliers).
For example "Landmark-II" is not a default field while adding up a supplier/customer. so you can add up upto 7 new custom fields with labels.

3. Create New Label & Field for Products information: When you are adding new product items in Products tab, you can have 4 more new custom fields with labels as an addition to the product information record. Type here in these fields Labels and get a new input field in your add product form.

4. Create New Label & Custom Field for Business Locations: If you are adding up multiple business locations, sometimes you need extra fields and your chosen label names. you can create new 04 Fields and their labels by typing label names in this setting fields as below:

5. Create New Label & Custom Field for Users: When you are adding up a new User in the default Look POS form, you can create 04 new custom fields with labels in that form by typing your chosen custom label in this setting as below:

Important! Please Do Not Forget to Save setting by pressing
Multiple Office Location Setting
Business Locations Details - Form Fillup

1. To Add New Business Location: Click on Settings>>Business Locations>>+Add, that will lead you a form.
2. Business Location Form The first part is to Fillup your new business location Name, Address, Contact, Mobile, Email, Landmark, City, State, Country. 
3. Invoice Setting @ New Location: The 2nd part is to Fillup your Invoice Scheme, layout is ready in Invoice settings and Selling price Group(If made different than 1st location. You can put here as default Look POS too. You can also create Custom Fields in this part of form.
4. Look Screen Featured Products Type here minimum 2 alphabets in the field and your product list will auto open. Then select the product to show your cutomers your most featured new products on screen at new location. 
5. Payment Options @ New Location:You can select to authorize your new business location cashier the customer payment option as cash/cheque/bank transfer/card/others, moreover Custom fields to any other option is to be added if. 6.Press Save to save it your new business location setting.


Invoice Scheme | Layout Settings | Design

Invoices Scheme Setting
Before creating a new location or storefront, you can define a new Invoice scheme or you can use existing invoice schemes. But having different invoice schemes for locations can help you to identify them. Invoice Scheme is invoice number format. Within Look POS you can configure the format for your invoice number.
1. To configure go to Settings -> Invoice settings
2. Click on Add and select a scheme format.
3. Format can be XXXX or
4. You can also provide a custom prefix, invoice start number, number of digits in the invoice number.
The preview box will display the preview according to the chosen option.

Note: You will need to set a default invoice scheme for a business to use it.
Invoices Layout Setting
If you wish to have a different invoice layout for the location then you should create an invoice layout before creating a new location.
Invoice Layout helps you to create different invoice formats.

To add your new Customised Invoice Layout:
1. Go to Settings->Invoice Settings->Invoice Layout->Add
2. Give a unique distinguishable Layout name
3. Add the text to be shown in the top/header of invoice. Generally, it can be your shop name, aligned center with Heading 1 format.
4. Customize your Heading Details as mentioned in below screen short.
5. You can check/uncheck the below
a. "Field for Customer Details".
b. "Fields to be Shown in Location Address".

c. "Field for Communication Details".

d. "Field for Tax Details".
6. You can customise Products Field Details and Check/Uncheck options.
7. You can customise Labels & Figures Detail and Check/Uncheck options for it.

8. You can customise Invoice Footer Detail and select as defaul too.

9. You can Check/Uncheck options for QR-Code.

10. You can setup credit note details.

11. You can mark a layout as default. The default layout is used when no layout is found for a location.
12. Click on Save.
13. To use an invoice layout in a location go to” Business Locations -> Edit” and assign the invoice layout.
Invoice Design
- In invoice layout, you will find options for invoice designs.
- Used for browser based printing only & NOT print server based printing.
- Slim design is used for thermal line printer based printer.
Barcode Printing Setting

Barcode is very import in product businesses, Look POS provides generating barcodes with its printing through a proper style sheet as per product barcode sticker size. Further it also provides to have multiple different style sheets list for different products. The list is editable and removable.
⬤ Sign-in "Look POS Online Office" and click on "Setting" >> "Business Setting" >> "Barcode Settings"
Create Barcode Sticker Style Sheet
1. Click on " +Add New Setting" Button on right top 
A new window will open to setup a style sheet
2. Then fill up the first field as "Sticker Sheet Setting Name". Type here the product concerned name to further follow for those products only.
3. Next 2nd field "Sticker Sheet Setting Description" where you can type a proper description of this style sheet concerning important comments. 
4. Next field where you can enable "Continue Feed or Rolls" which will keep it printing until a rolls finishes, if user doesn't want to print on sheets.

5. Further you can place top & left margins for a Barcode Sticker Paper Sheet(A4 or any) printing.

Type in inches width & hight of Barcode Sticker size in below fields.
6. Next fields are for sticker paper sheet width & height in inches i.e. W=8.4 & H=11.4

7. In next field "Stickers in One Row" where you know the sticer size and sticker paper sheet size, so you can print single and multiple stickers in one row.

8. You will define the distance of sticker rows and columns in inches.
9. You can define in next field "No. of stickers in a sheet". You already know the sizes and it is easy to provide numbers as you required in one sticker paper sheet.

10. Next last field is "Set as Default" means to keep this style sheet as default.

Important! Kindly do not forget to press on "Save" button on right side of settings.![]()
Printers(Receipts) Connection Setting

⬤ Sign-in "Look POS Online Office" and click on "Setting" >> "Business Setting" >> "Barcode Settings"
You can setup/add Network / Windows / Linux based printers to Look POS Online Office once in the start. Mulitple printers can also be added which is shown as a list in this tab(shown in above screen short). How to add printers? is detailed below:
Add a Printer
1. Click on "+ Add Printer" on right top corner 
A form will be opened as "Add Printer"

2. Type a concerned printer name.

3. Select accessable printer connection from "Connection Type" like if your want to use "Network" or "Windows" or "Linux" printer.

4. You can select "Compatibiliry Profile" from this list having standard profiles like "Default", "Simple", "Star Branded", "Espon Tep" & "P822D".

5. You can type the characters number within a line.

6. Type IP address and port numbers in next last two fields. Mostly the printers works on "9100" as port.

Important! Kindly do not forget to press on "Save" button on right side of settings.![]()
TAX Setting

⬤ Sign-in "Look POS Online Office" and click on "Setting" >> "Business Setting" >> "Tax Rates"
You can create/add a list of Taxes and its default rates.
Moreover you can create new Taxes Groups can be applied on specific products while purchasing/selling them in Look POS.
How to Add A Tax Name & Rate
1. Click on "+ Add" on right top corner  of "All Your Tax Rates" tab.
A form will be opened as "Add Tax Rate"
2. Type a new Tax name(GST, VAT etc..) in the field "Name".

3. Next field is "Tax Rate %" where you can type a percentage without its symbol(%), like "12.5" only. If you type "0" then it will be considered as Tax Exampt.

4. Further you can enable "Tax Group Only" checkbox, so the tax will not be shown indvidually while applying it but in a Tax Group will be auto applied. Or you can keep it unchecked to setup the tax applicable indvidually.

5. Important! You must press "save" button to save the Tax details, if you press close then the Tax Details will not be saved and form will close.

6. After saving the new Tax, it will be added to your main Taxes list. Where you can edit and delete any taxes.

How to Create a Tax Group from Taxes List?
1. Click on "+ Add" on right top corner of "Tax Groups" tab.
A form will be opened as "Add Tax Group"
2. Type a new Tax Group name of your choice in the field "Name".
3. Next field is "Sub Taxes" where you can select multiple Taxes which were already added by you in your Taxes Lists.

5. Important! You must press "save" button to save the Tax Group details, if you press close then the Tax Details will not be saved and form will close.
6. After saving the new Tax, it will be added to your main Tax Groups List. Where you can edit and delete any tax group.
